

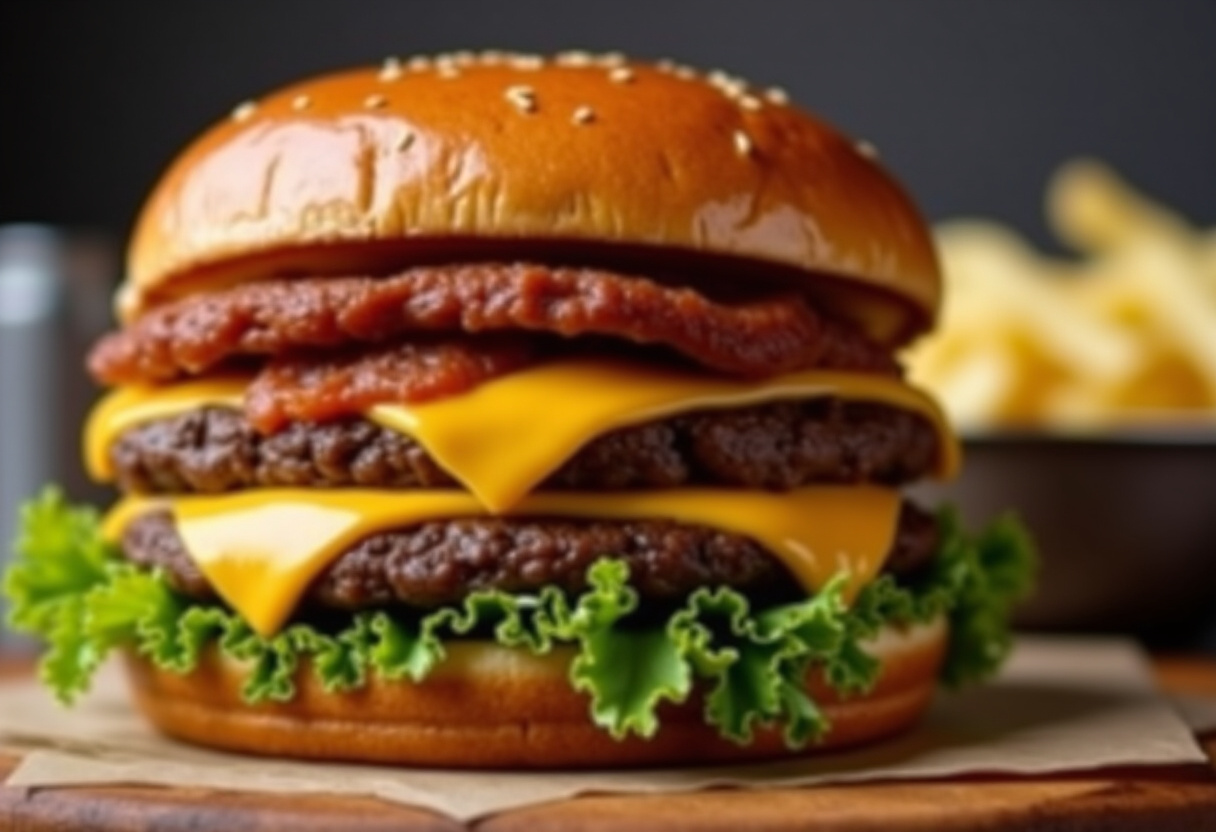
Ultimate Juicy Cheeseburger: The Perfect Bite of Heaven 🍔🔥🧀
1. Introduction
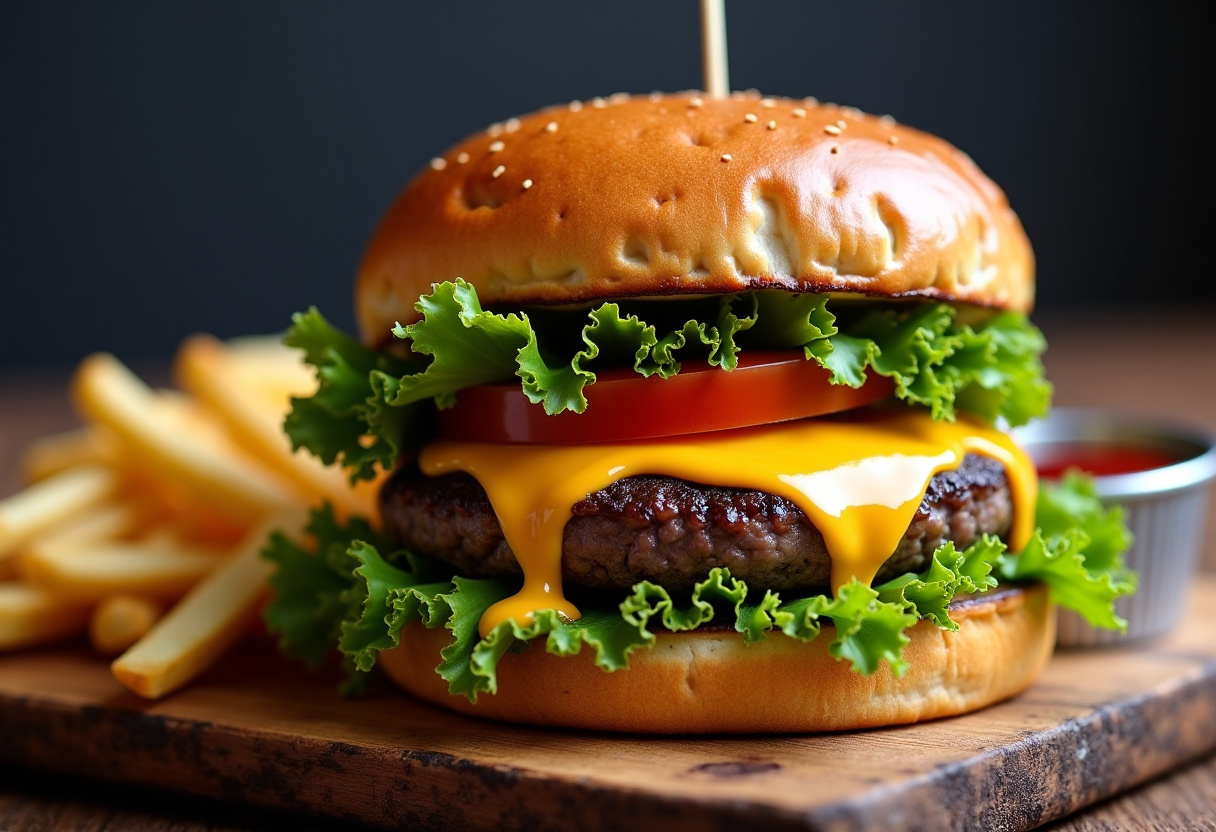
There’s something magical about sinking your teeth into a perfectly cooked, juicy cheeseburger. That first bite where the melted cheese stretches, the juices drip down your fingers, and all the flavors come together in perfect harmony – it’s pure culinary bliss. Whether you’re firing up the grill for a weekend barbecue or satisfying a weeknight craving, this Ultimate Juicy Cheeseburger recipe will transport you to burger heaven. We’ve perfected every element – from the ideal meat blend to the secret technique that keeps every bite succulent. Follow our comprehensive guide to create what might just become your new favorite dinner recipe idea!
2. Ingredients
Great burgers start with quality ingredients. For four restaurant-quality cheeseburgers that will have everyone asking for seconds, you’ll need:
- 1 lb (450g) ground beef – The 80/20 lean-to-fat ratio is crucial for juicy results. This means 80% lean meat and 20% fat content, which melts during cooking to create that signature juiciness.
- 1 tsp salt – Kosher salt is ideal as it seasons evenly without being overpowering.
- 1 tsp black pepper – Freshly ground adds the best flavor.
- 1 tsp garlic powder – For that deep, savory umami note.
- 1 tsp onion powder – Adds subtle sweetness and complexity.
- 4 slices American or cheddar cheese – American melts beautifully, while sharp cheddar offers more flavor. For the ultimate experience, try a blend!
- 4 sesame seed buns – Toasted to golden perfection for texture contrast.
- Fresh toppings – Crisp lettuce, ripe tomato slices, crunchy pickles, and thin onion rings for brightness and crunch.
- Condiments – A trio of mayonnaise, mustard, and ketchup creates the classic flavor profile.
3. Step-by-Step Instructions
Step 1: Prepare the Burger Patties
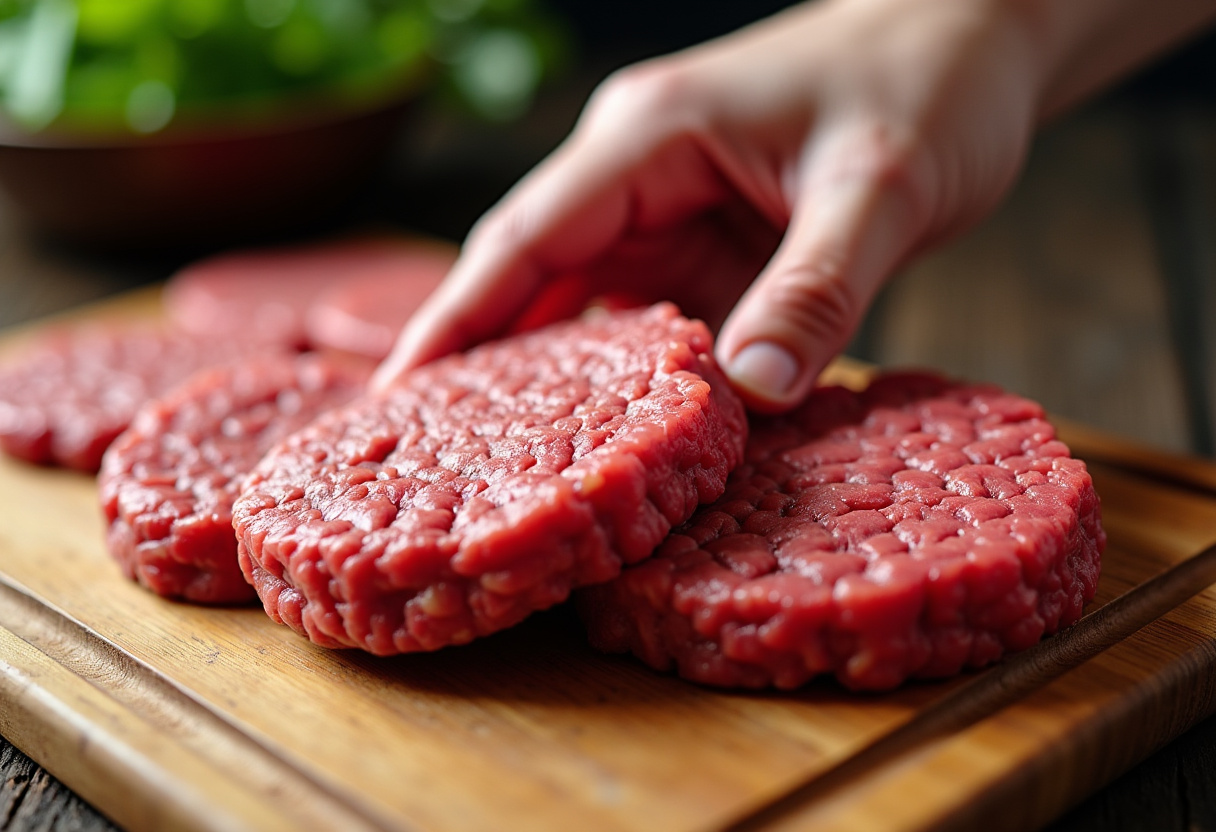
This step is where many home cooks go wrong. Start by gently dividing your ground beef into four equal portions (about 4oz each). Instead of rolling the meat into balls, lightly form them into loose mounds. Then, using a light touch, shape them into patties about ½-inch thick and slightly wider than your buns (they’ll shrink during cooking). The key is to handle the meat as little as possible – overworking creates tough burgers. Create a slight dimple in the center of each patty with your thumb; this prevents the dreaded “burger bulge” during cooking. Season generously on both sides with your spice blend, but don’t rub it in – let it sit on the surface for maximum flavor impact.
Step 2: Grill the Patties to Perfection
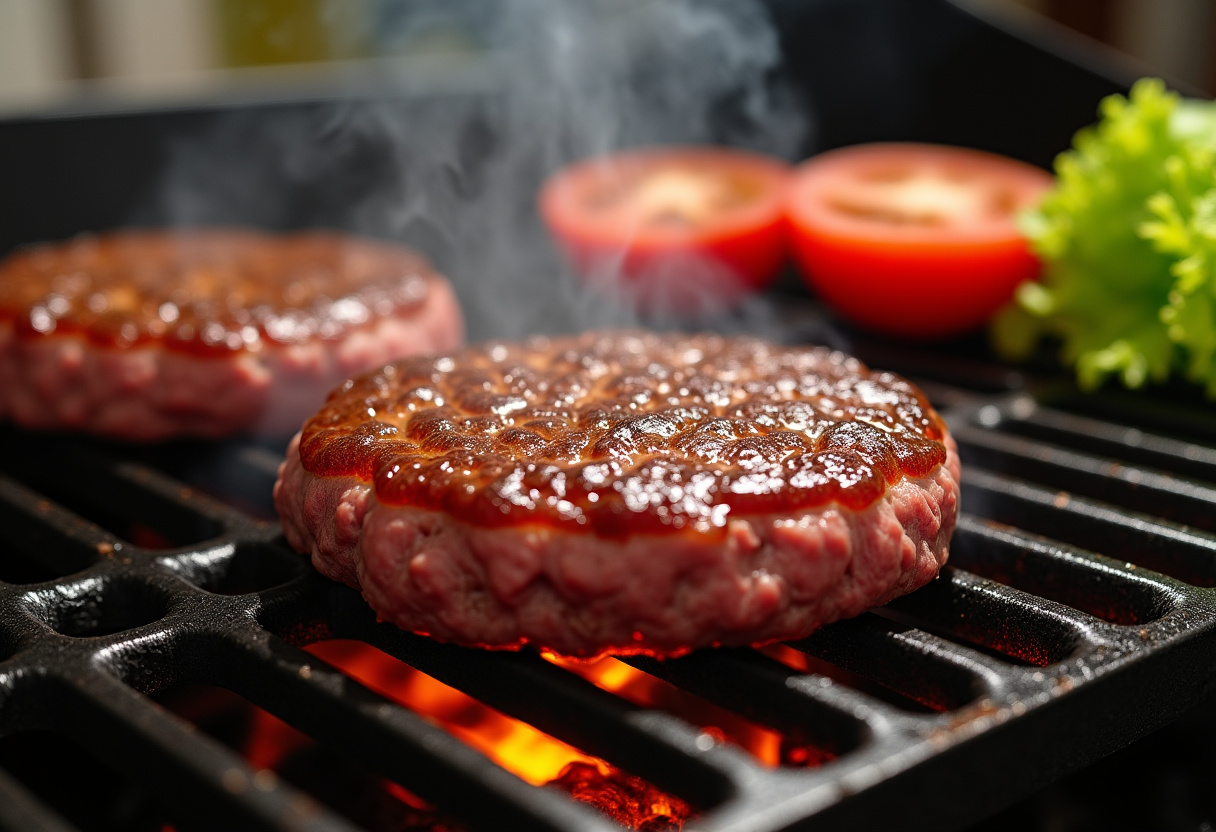
Preheat your grill, cast iron skillet, or griddle to medium-high heat (about 375°F). A properly heated cooking surface is essential for creating that beautiful crust while keeping the interior juicy. Place your patties on the hot surface and resist the urge to press them down – this squeezes out precious juices! For medium doneness (the ideal for cheeseburgers), cook for 3-4 minutes per side. The exact time will vary based on your cooking method and patty thickness. About 1 minute before they’re done, add your cheese slices. For extra melty goodness, cover with a lid or metal bowl to create a steamy environment that helps the cheese melt perfectly. If you’re looking for more grilling tips, check out this excellent resource on juicy burger techniques.
Step 3: Assemble the Burger
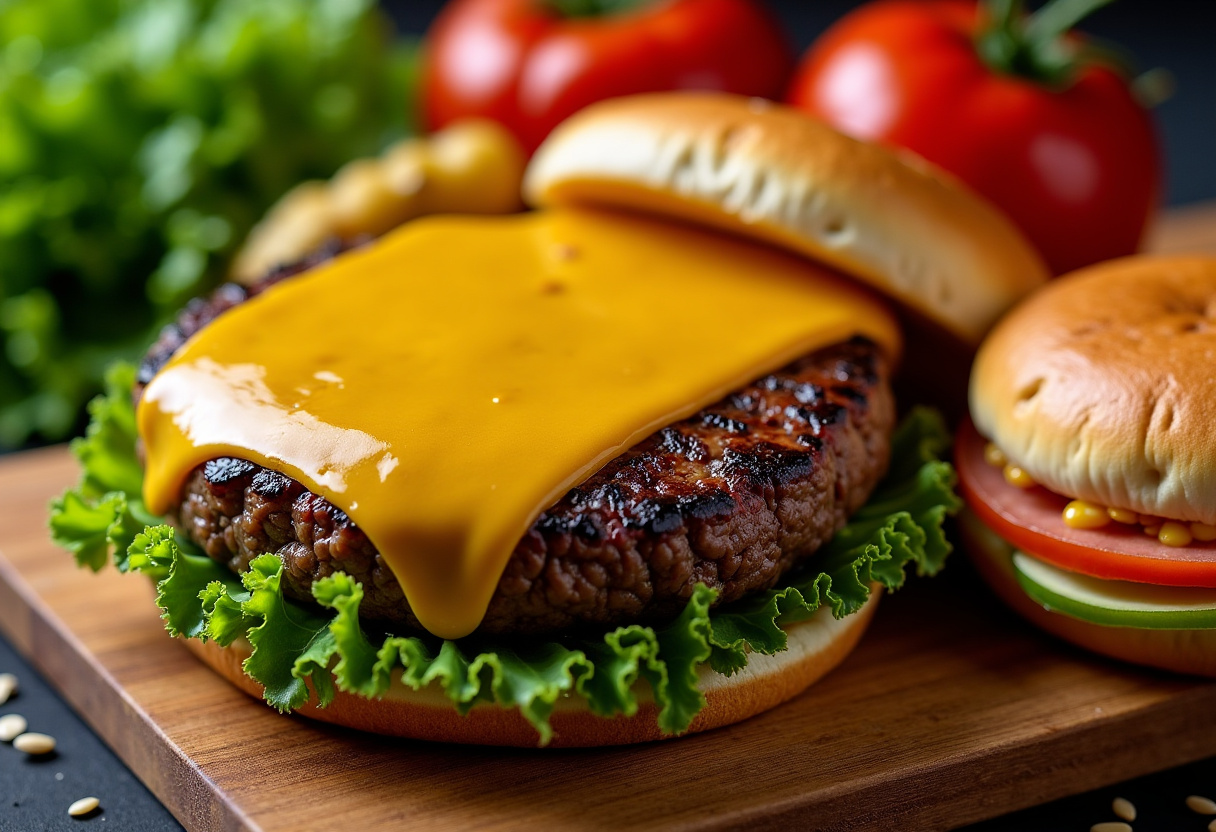
While the patties cook, prepare your buns and toppings. Lightly toast the buns – this creates a barrier against sogginess and adds wonderful texture. Spread your condiments on the bottom bun (this helps anchor the other ingredients). Build your burger in this order for optimal structural integrity: bottom bun with condiments, lettuce (acts as another moisture barrier), tomato slices, pickles, the glorious cheese-topped patty, onions, then top bun. The weight distribution matters – heavier items like the patty should be centered to prevent sliding. Press down gently just before serving to help everything stick together.
Step 4: Serve & Enjoy!
Now for the best part – enjoying your creation! Plate your masterpiece with classic sides like crispy fries or onion rings. For beverage pairings, a cold craft beer or thick milkshake complements the rich flavors beautifully. As you take that first bite, notice how the crisp vegetables contrast with the juicy patty, how the melted cheese binds all the flavors together, and how the toasted bun holds everything in perfect harmony. This is what burger dreams are made of!
4. Pro Tips for the Best Juicy Cheeseburger
- Meat matters: The 80/20 ratio is perfect – less fat leads to dry burgers, more can cause flare-ups.
- Keep it cold: Chill your meat before forming patties – it helps them hold together better.
- Season smart: Apply seasoning just before cooking to prevent drawing out moisture.
- Rest time: Let cooked patties rest 3-5 minutes before serving – this redistributes juices.
- Bun wisdom: Lightly buttering buns before toasting adds flavor and extra crispness.
- Cheese choices: Experiment with blends – try 50/50 American and sharp cheddar for best of both worlds.
5. Delicious Variations
- Bacon Cheeseburger: Add 2-3 strips of crispy applewood-smoked bacon and a smear of barbecue sauce.
- Mushroom Swiss: Top with garlicky sautéed mushrooms and nutty Swiss cheese.
- Spicy Southwest: Mix 1 tsp chili powder into the meat, top with pepper jack cheese and jalapeños.
- Breakfast Burger: Add a fried egg and swap the cheese for melty American.
- Blue Cheese: Crumble tangy blue cheese on top with caramelized onions.
6. Perfect Pairing Suggestions
Complete your burger experience with these accompaniments:
- Classic sides: Crispy French fries (double-fried for extra crunch), sweet potato fries, or beer-battered onion rings
- Lighter options: Vinegar-based coleslaw, grilled corn on the cob, or a crisp garden salad
- Beverages: Ice-cold lager or IPA, creamy milkshakes (vanilla or chocolate), or craft sodas
- Desserts: Classic apple pie, chocolate chip cookies, or a root beer float
7. Storage & Reheating Tips
While best enjoyed fresh, you can store components properly:
- Uncooked patties: Separate with parchment paper, freeze in airtight container for up to 3 months. Thaw overnight in fridge before cooking.
- Cooked patties: Store in fridge up to 3 days. Reheat gently in skillet with 1 tsp water, covered, to retain moisture.
- Assembled burgers: Not recommended – components get soggy. Store separately and assemble fresh.
8. Frequently Asked Questions
Q: Why does my burger always shrink and bulge in the middle?
A: This happens when the edges cook faster than the center. The dimple technique helps, as does using consistent thickness and moderate heat.
Q: Can I use leaner ground beef to make it healthier?
A: You can, but the texture will be denser and less juicy. For a healthier option, try blending 85% beef with 15% finely chopped mushrooms.
Q: How do I know when my burger is done without cutting into it?
A: Use the finger test: Gently press the center. Rare feels like your cheek, medium like your chin, well-done like your forehead. Or use a meat thermometer (160°F for well-done).
Q: What’s the best way to toast buns?
A: Lightly butter the cut sides and toast in a dry skillet over medium heat until golden, about 1-2 minutes per side.
9. Conclusion
Mastering the perfect juicy cheeseburger is a culinary achievement worth pursuing. With this comprehensive guide, you now have all the tools to create burger perfection in your own kitchen. Remember – great burgers are about quality ingredients, proper technique, and a little bit of love. Whether it’s a casual weeknight dinner or your next backyard barbecue, this Ultimate Juicy Cheeseburger recipe will impress every time. The combination of a perfectly seasoned, juicy patty, melty cheese, fresh toppings, and a toasted bun is simply unbeatable. So fire up that grill or skillet, gather your ingredients, and get ready to experience cheeseburger nirvana. Happy cooking, and even happier eating!


No comment